How to Set up And Use Apple Pay on Apple Watch to Pay Easily

As an Amazon Associate, I earn from qualifying purchases.
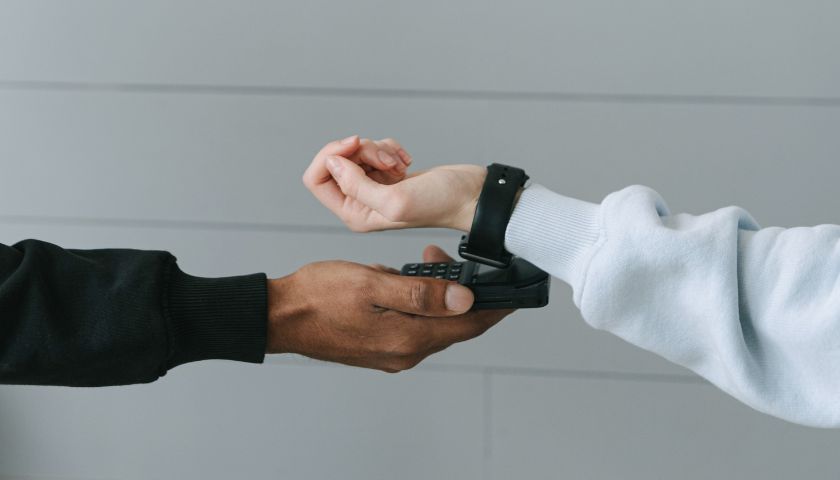
Paying with your wrist is now easier for individuals compared to the past few years. It will be easier if you have an Apple Watch and iPhone. Knowing how to set up and use Apple Pay on Apple Watch may make it more enjoyable. Most people want to add it to their wristwatch but hang in ignorance.
The first step is to enjoy it with the help of an iPhone and a secure internet connection. Then you need to add a card by scrolling through the “Wallet and Apple Pay” option. After that, there are some more steps that you will get from the below information.
Meanwhile, remember that Apple Pay is primarily designed for iPhone devices. Although it does not require an official app specifically designed for the Apple Watch, it can still be used on Apple watches.
How to Set Up & Use Apple Pay on Apple Watch – 8 Steps That Need to Follow
To use Apple Pay on an Apple Watch, you need to follow these steps strictly:
Step 1: Pair with iPhone / Android Phone
The first step that must be maintained firmly is pairing both devices. Therefore, ensure your Apple Watch is paired with your iPhone and connected to the internet.
Step 2: Open App & Scroll
Open the Apple Pay app on your iPhone and sign in to your account. If you don’t have the Apple Pay app, download it from the App Store. Now, go to the App and open the Apple Watch on your iPhone. Up next, scroll down and tap “Wallet & Apple Pay.”
Step 3: Click on the “Add to Card” Option
Tap the “Add Card” and follow the instructions. Once your card is added to Apple Pay, open the Watch app again and go to “Wallet & Apple Pay.”
Step 4: Review the Information
After doing step-3, now enter the instructional parts. There, you get a lot of data management advice to follow, and it will end up with an option regarding “Continue.”
Step 5: Select the Type of Card
Now, select the type of card from your watch. Now, tap on either debit card/Credit card/transit card, whatever you want.
From there, you can scan the card or flip the card details manually. You will get instructions to follow on-screen when you tap on it. After confirming all these things, you’ll receive a verified email from the Apple Pay authority. Complete the verification section.
Step 6: Enable the Toggle Switch
Now, enable the toggle switch for “Mirror my iPhone” to ensure that the cards added to your iPhone’s Apple Pay are also available on your Apple Watch.
Step 7: Open Apple Pay App Again
Open the Apple Pay app on your Apple Watch. You will get some on-screen instructions again. Ensure your watch is set up for Apple Pay by following the instructions. Once you’ve completed the setup, you should see your cards from Apple Pay on your Apple Watch.
Step 8: Get Ready to Make Payment
To make a payment on your watch, double-press the side button to bring up the default payment card. Multiple cards can be selected by swiping left or right.
Hold your Apple Watch close to the payment terminal or contactless reader until you see a checkmark or hear a beep indicating the payment was successful.
Remember that the availability of Apple Pay on your wristwatch may vary depending on region and the supported banks and financial institutions. It’s also essential to ensure that your credit or debit card is compatible with Google Pay and Apple Pay.
How to Use Apple Pay on Watch Ultra?
If you’ve owned an Apple Watch Ultra, follow the instructions below. All these steps are easy to function and quickly set up without hassle.
- Pair your watch and iPhone altogether. Ensure you’ve turned off both devices’ Wi-Fi or internet connection.
- Now, tap on the “My watch” option and then scroll and tap to “Wallet & Apple Pay.”
Note: select the “Add next” option from your phone if you’ve previously set up another card or device on the watch. Delete all the information from the previous card from there and tap “Add to next.”
- Now, enter the card’s CVV to add a new card to your watch.
- The “Add card” option can also be used to add a new default card to the watch.
Now wait for a while and follow the strict instructions provided by the device. After these steps, you will ask to set up a default card or any card on the Apple Watch Ultra. Let’s learn from below about how to do that.
- Tap the right-corner icon in the wallet app.
- Scroll and scroll to find the Add to Card option.
- Once you get it, choose any option, including an Apple account, Debit or credit, or transit account.
- You’re now half done with the process. On the last task, you must maintain all the instructions provided by the apps to confirm. Therefore, do them properly and wait. Voilà! You’re now to make payment through the watch via your transaction card.
For the default cards,
- Open up the wallet app once again.
- Now, click on My Watch> Wallet> and Apple Pay.
- Again, select the default card and choose the card you want to add.
Note: In case there is any emergency, reorder your payment card. Herein are the minor procedures to do. Go to your wallet app, then touch the card. Hold it briefly and drag it to fix on a new position. That’s it; your card is now reordered and confirmed.
How to Remove a Transit Card from Apple Pay?
It is necessary sometimes to remove transit cards from the App for some restrictions, trouble, or emergency. Thinking about all these things, I discuss below how to delete or remove any credit or debit card from Apple Pay on your watch. Herein are the steps to follow:
- Open the App
- Flip on the selected card
- Scroll and then tap on the “Remove” option.
Following these steps, anyone can also remove the card from their iPhone. Go to the watch app, then Apple Pay. After that, select the card and tap the “Remove” option.
What Is the Advantage of Having Apple Pay on Apple Watch?
The advantages of using Apple Pay on an Apple Watch are huge. You cannot count it down in single words. However, below you’ll get little ideas on how come it works to make our life more facile and comfortable:
1. Works As Convenient Payments
With Apple Pay on your watch, you can make payments quickly and conveniently without taking out your phone or wallet. Hold your wrist near a compatible payment terminal, and the payment will be processed.
2. Wide Acceptance
Apple Pay is widely accepted by merchants and payment terminals, making using your Apple Watch for payments in numerous locations convenient.
3. Secure Transactions
Apple Pay provides multiple layers of security to protect your payment information. It encrypts your card details and uses tokenization to replace your card number with a unique token, ensuring your sensitive information remains secure during transactions.
4. Loyalty And Rewards
This transaction app makes adding your loyalty cards and reward programs much more straightforward. Anyone can easily earn and redeem points or benefits directly from your Apple Watch.
This eliminates the need to carry physical cards and streamlines the reward redemption process.
5. Notifications And Transaction History
Apple Pay provides real-time transaction notifications, informing you about your payment activity. Additionally, you can view your transaction history within the Apple Pay app on your iPhone, giving you a comprehensive record of your purchases.
6. Seamless Integration
If you already use Apple Pay on your devices or other platforms, using it on your Apple Watch provides seamless integration between devices. Your payment information and preferences will sync across devices, making it easy to manage your payments.
Frequently Asked Questions (FAQs)
Is Apple Pay Safe to Use on Apple Watch?
Yes, it is safe to use on Apple Watch. Because the authority directs all their data and payment information in a strict security measurement while anyone using the App, again, all the card information will be removed from the wallet once you unpair the device.
Can I Pay with My Apple Watch without Using My iPhone?
Of course, you can pay through your Apple Watch without using any other device once paired with the iPhone. You can use the iPhone sparingly whenever it is time to pay with your watch.
Can I Add My Transit Cards to Apple Pay Wallet?
There are vast options of transit cards available regarding adding to the Apple Pay wallet. But before that, you need to confirm that your transit agency is on the participating list on Apple Pay.
Why Did My Apple Watch Not Function Properly While Added to Apple Pay?
Sometimes it happens due to needing access from the card issuer. If it is a card issue, ensure your transit card company will be informed. You can contact them to know whether their bank cards are permissible to use on Apple Pay. Besides, some more reasons may cause such a problem.
One common reason is not updating the latest version of the iPhone. In that case, keep it updated and check that you’ve set up the legal and exact passcode of your Face ID, Touch ID, and other applications.
Is Apple Pay Work the Same as Apple Wallet?
Apple Pay and Apple Wallet are different in their work. But they’re interrelated when anyone wants Apple Pay access to Apple Watch. Apple Pay gives you legal permission to make a safe and secure payment in any store, online shop, or website.
Meanwhile, Apple Wallet works as a storehouse where you can securely keep all the information of your credit card or debit cards to use on Apple Pay.
Final Thought
Apple Pay is an excellent device since it allows you to make payments without the hassle of security codes or other requirements. It brings the bank in your wrist and works like magic. However, feel free to learn how to set up and use apple pay on apple watch.
This helps you to manage all the terms and conditions appropriately. Again, remember to keep alert for cyberattacks or spamming.
Apple Pay is a suspected feature to leak individuals’ personal information. Therefore, avoid using it on public Wi-Fi while purchasing or making payments through your watch.
As an Amazon Associate, I earn from qualifying purchases.
- 9 Best ABC (Altimeter, Barometer, Compass) Watches Of 2025 - July 5, 2023
- How to Get Rid of Watch Rash Instantly | Learn 7 Excellent Ways - June 2, 2023
- How to Set up And Use Apple Pay on Apple Watch to Pay Easily - May 17, 2023


